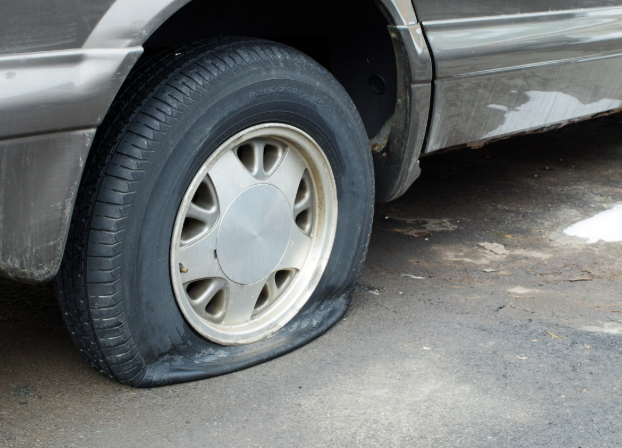
Few situations are as bothersome and aggravating as experiencing a flat tire. Whether you’re on your way to a crucial meeting or simply returning home from work, the sound of a flat tire can instantly spoil your day. However, there is a silver lining to this situation, changing a flat tire does not always necessitate contacting roadside assistance. With the appropriate resources and professional car mechanic, you can successfully complete the task and resume your journey promptly.
This Change Flat Tire Guide will provide you with a step-by-step process, essential tools, safety precautions, and all the necessary information to confidently handle a flat tire situation.
Emergencies do not pause for ease. Picture yourself stranded on a desolate road in the dead of night, far away from any assistance. Acquiring the skill of changing your own tire grants you independence, saves time, and avoids unnecessary expenses. Additionally, the feeling of satisfaction that arises from resolving the problem independently is unparalleled.
Before encountering a flat tire, ensure that you have the necessary tools need to change a tire readily available in your vehicle at all times.
These items are your tire repair kit. Always place these items securely in your car where you can easily reach them when needed.
Securing Safety Should Be Our Priority. If your tire blows out while you’re on the road, find a safe and level area to pull over, away from any moving vehicles. The perfect spot is a peaceful, level area with firm ground, such as a parking lot, side street, or emergency shoulder.
Do not drive on loose soil, slopes, or bends in the road. When attempting to change a tire on uneven or unstable ground, the likelihood of the car losing traction and sliding off the jack is heightened. If you’re driving on a highway, make an effort to locate an exit or a wide lane to pull over. Activate your hazard lights promptly to notify other drivers of your presence.
Divide the procedure into smaller, more achievable tasks. Even if it’s your first time, following this guide will make the task easier.
As soon as you detect any issues, decelerate and activate your hazard lights. Locate a secure, level area to park. Check the wheel wedge or brick behind the tire position on the opposite side to ensure that the parking brake is safe and prevents the car from rolling.
Retrieve your jack, lug wrench, and spare tire from the trunk of your vehicle. If it’s dark, utilize your flashlight to examine the tire and your surroundings. If a warning triangle is accessible, it is advisable to position it behind your vehicle, particularly on congested roads.
One of the most crucial steps is determining the appropriate location to place the jack when changing a tire. Incorrectly positioning the jack can result in damage to your vehicle or even cause it to come loose from the jack.
Refer to your vehicle’s manual as each automobile has particular jack points.
It is crucial to avoid placing the jack in the middle of the car’s underside or on any plastic or soft surfaces. Once in place, gradually raise the car until the flat tire is approximately six inches above the ground.
Utilize the lug wrench to rotate each nut in the counterclockwise direction. In some cases, you may have to rely on your foot or body weight to loosen stubborn nuts. Don’t eliminate them entirely, just loosen them.
After the car is lifted and the lug nuts are loose, remove them completely and carefully detach the tire from the hub. Position the flat tire on the ground to prevent it from moving.
Position the holes in the spare tire in line with the lug bolts and carefully insert it into its designated spot. Replace the lug nuts and tighten them individually, following a star pattern, to guarantee uniform pressure distribution.
With caution, lower the car using the jack until the tire makes contact with the ground. Utilize the lug wrench to ensure the lug nuts are securely fastened, repeating the crisscross/star pattern for optimal stability. Don’t overdo it, ensure until tight.
Place your flat tire, tools, and wedges back in the trunk. If you’re using a temporary spare tire, drive at a slower speed (no more than 50 mph) and replace it with a full-size tire as soon as you can.
Avoid these errors, and your tire change will go smoothly and safely.
Knowing how to handle a flat tire is one of the most empowering skills for any driver. With the right mindset, a little preparation, and this comprehensive change flat tire guide, you’re ready to face the unexpected. Always remember the importance of proper safety, knowing where to put the jack when changing a tire, ensuring you’re in the best place to change your flat tire, and using the tools needed to change a tire correctly.
Don’t let a flat stop your journey. With this guide, you’re not just fixing a tire, you’re reclaiming control, one lug nut at a time.
Stay connected with us for updates on automotive services, tips, and special offers. Trust our team for reliable solutions that keep your vehicle in top shape